Using Virtualbox to Set Up a Virtual Environment
When looking to create a lab, one option would be to obtain physical machines. However, it is possible to install virtual machines on a single computer using virtualization technology such as Virtualbox. This requires that your host computer has sufficient resources, such as memory and storage, with the amount of resources that you allocate to the virtual machine being shared by your host computer. This post will cover how to set up a virtual machine which will run the Ubuntu operating system.
Downloading and Installing Virtualbox
Start by downloading Virtualbox from here. Once downloaded, the setup can be run by accepting the defaults for each step. After this has been done, an operating system also needs to be downloaded. This demonstration will be using Ubuntu 22.04.1.
Creating a Virtual Machine
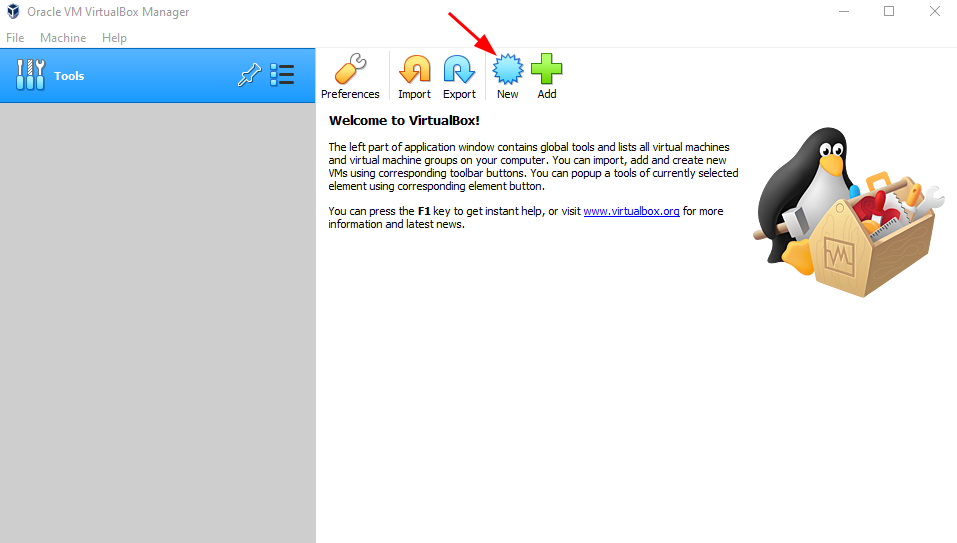
- With Virtualbox open, select "New":
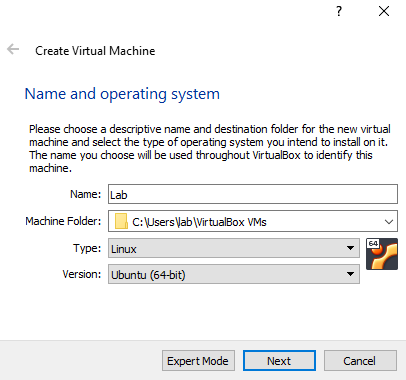
- Enter the details for the virtual machine you are creating:
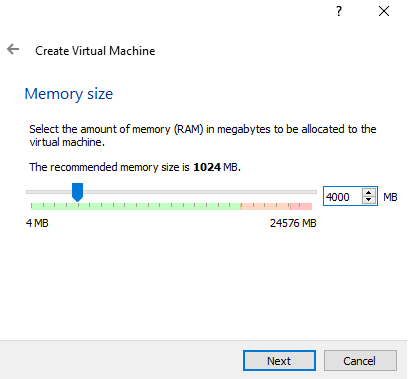
- Specify the amount of memory for the virtual machine:
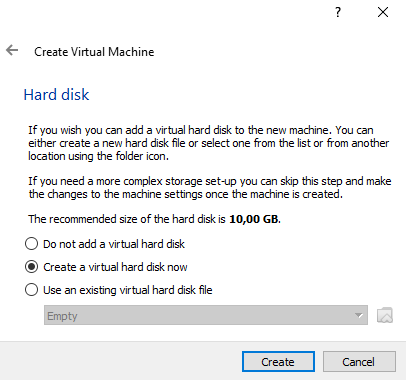
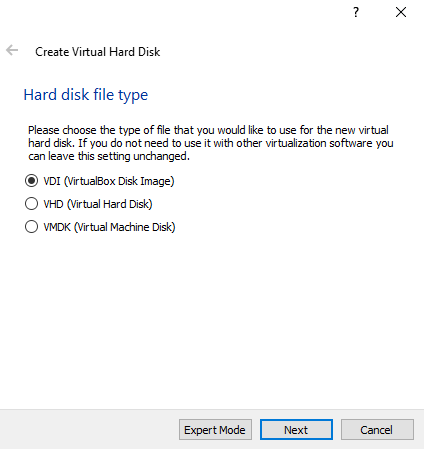
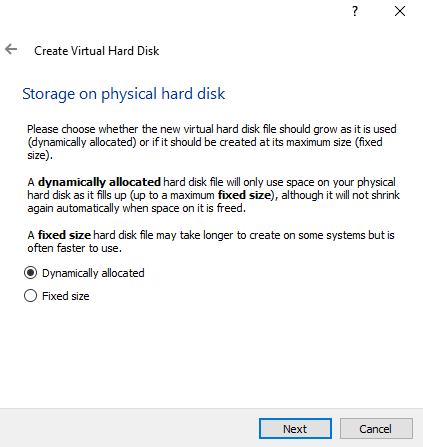
- Select "Create" to create a hard disk and continue to select "Next" while accepting the "VDI" and "Dynamically allocated" options:
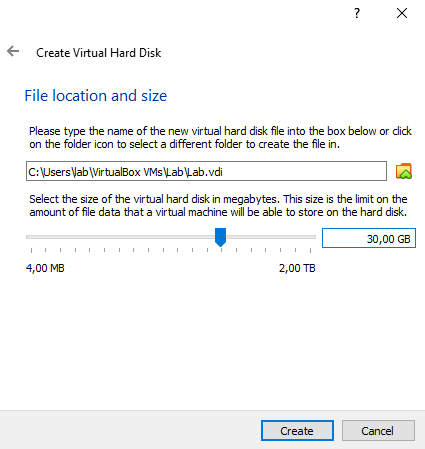
- You will then need to specify the hard disk size then click "Create":
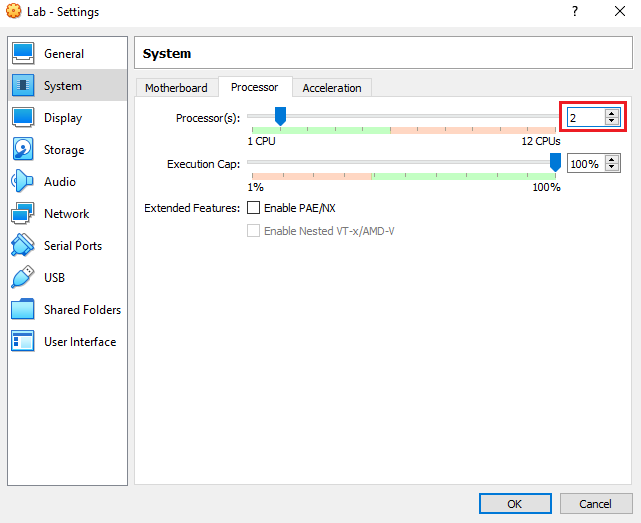
- Set the processor to use 2 CPUs under Machine > Settings > System > Processor:
Installing Ubuntu on the Virtual Machine
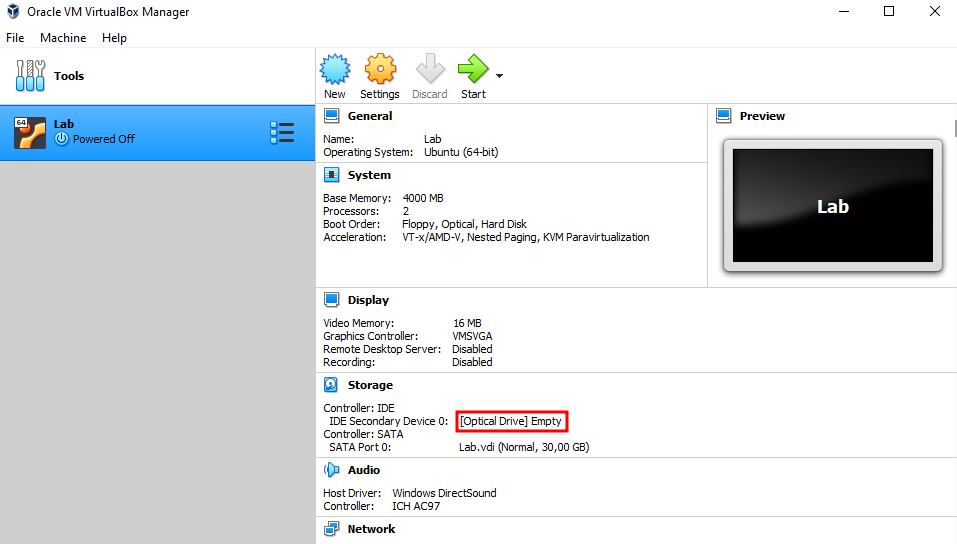
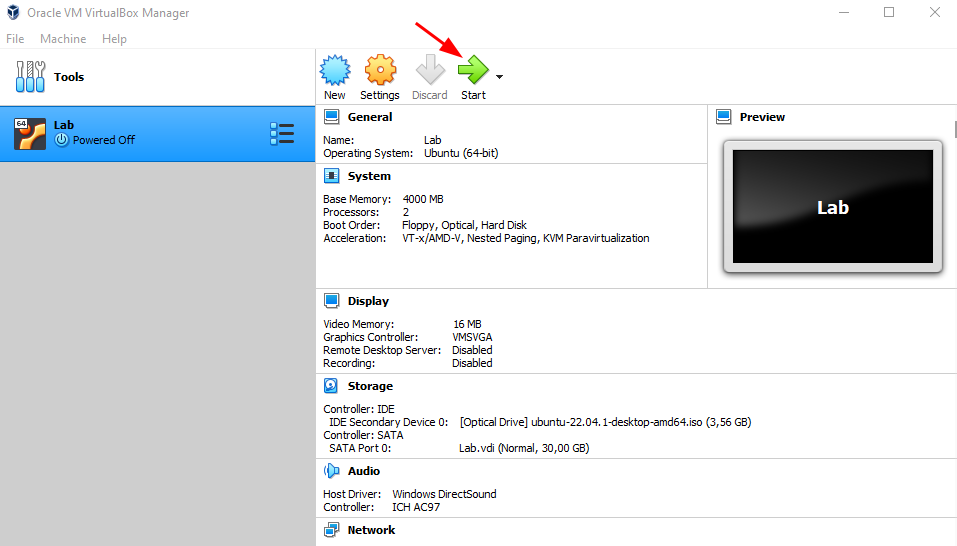
- Select Optical Drive > Choose a disk file and select the Ubuntu iso file to insert it into the virtual machine
- Start the virtual machine:
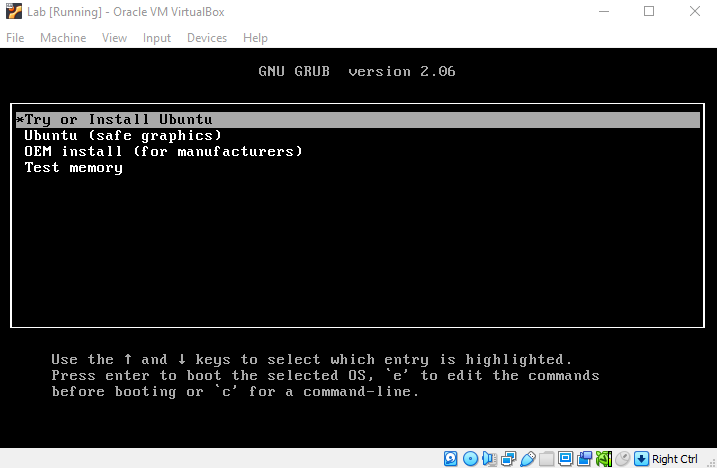
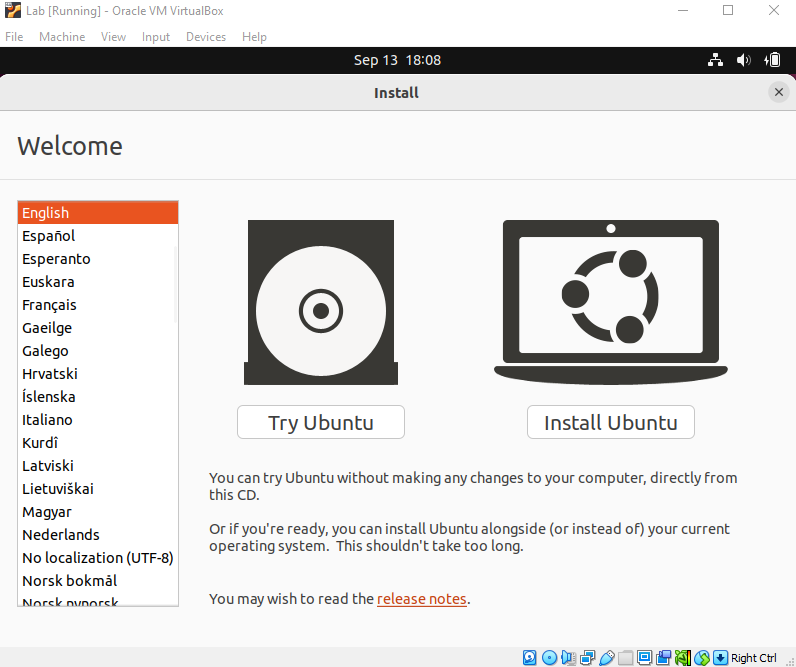
- Select "Try or install Ubuntu":
- Select "Install Ubuntu":
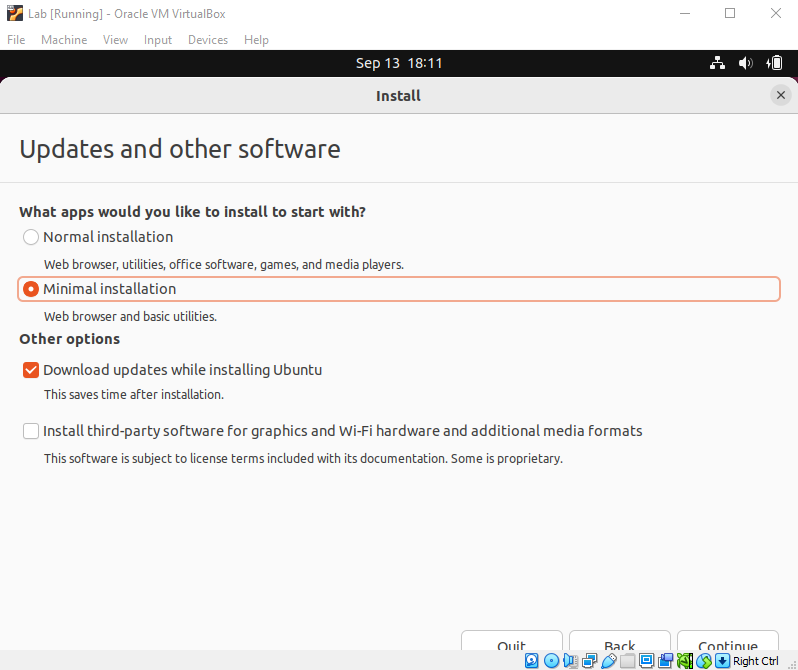
- Continue until "Updates and other software" - this setup will be using a minimal installation:
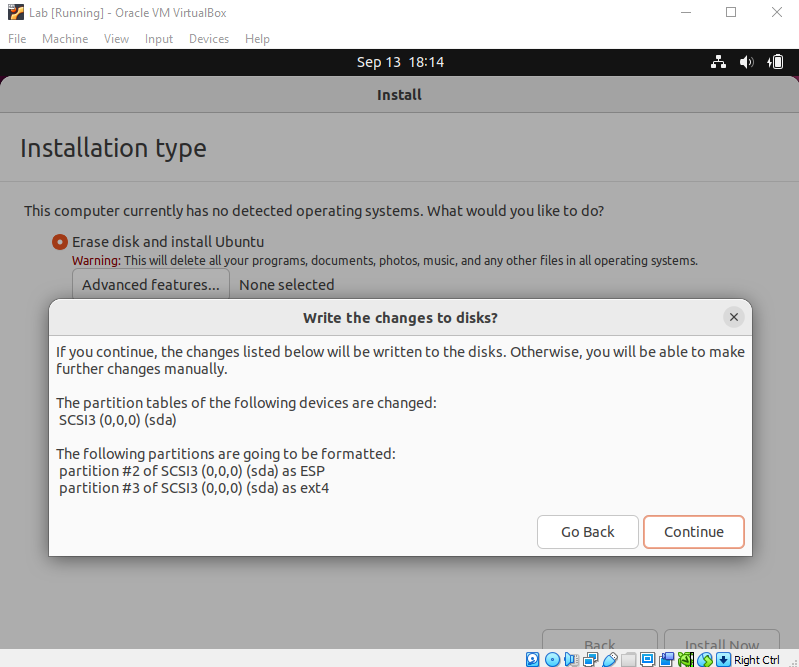
- Next, select "Erase disk" and continue with the installation:
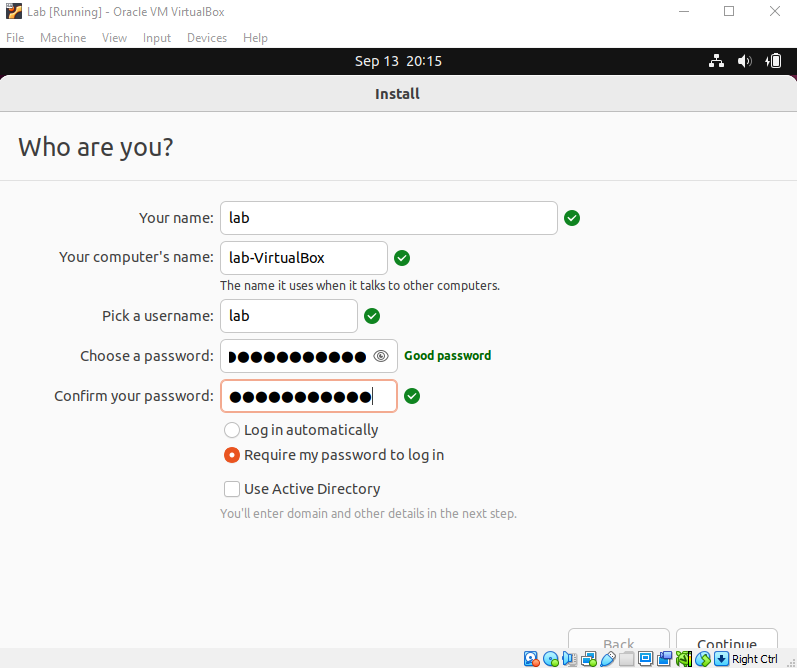
- Enter the user details and password:
- The installation will begin and once finished, the virtual machine will need to be restarted. Below is the virtual machine once this process is complete:
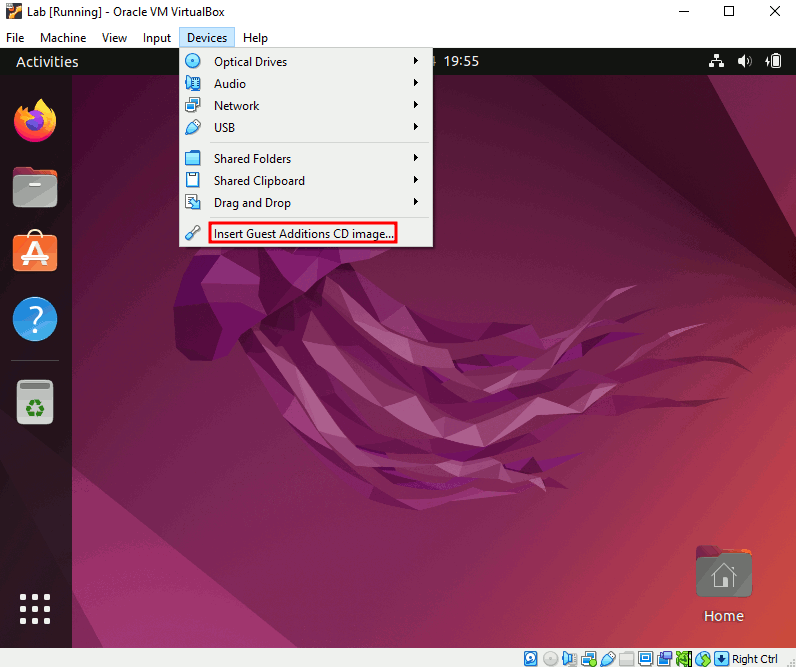
Installing Guest Additions
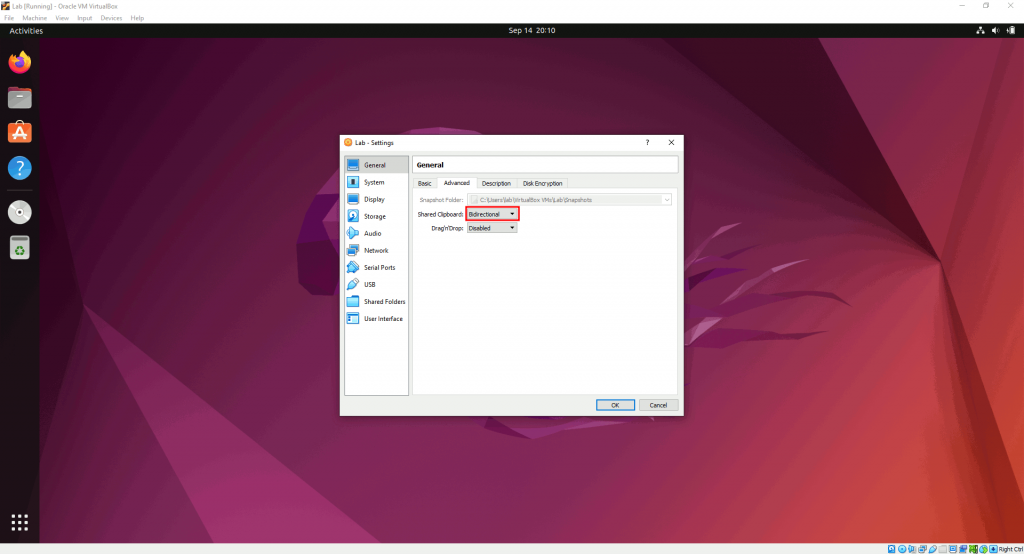
In this section, we will be installing the Guest Additions software that comes with Virtualbox. This will allow us to use the virtual machine with an increased resolution in full screen and enable a shared clipboard for copying text between the virtual machine and the host computer.
- Select Devices > Insert Guest Additions CD image:
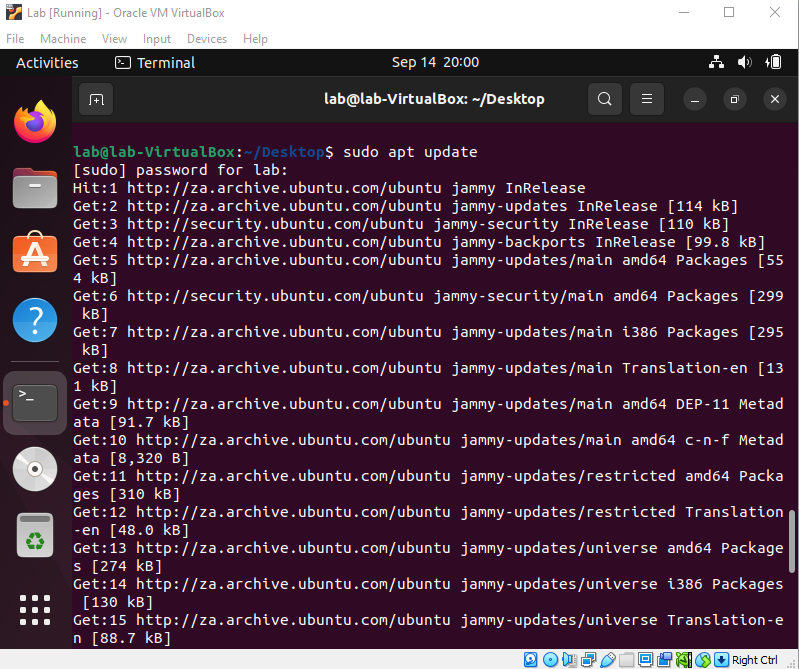
- Open a terminal by right-clicking and selecting "Open in Terminal"
- Run
sudo apt updateto update the package lists:
- Run the below to install pre-requisite packages:
sudo apt install gcc make linux-headers-$(uname -r)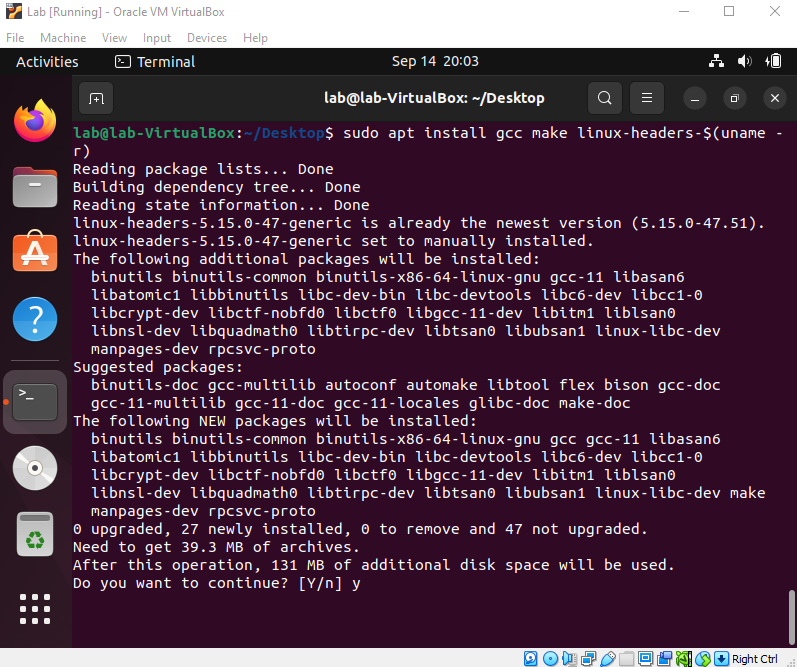
- We can then install Guest Additions by running:
cd /media/lab/VBox_GAs_6.1.38/
sudo ./VBoxLinuxAdditions.run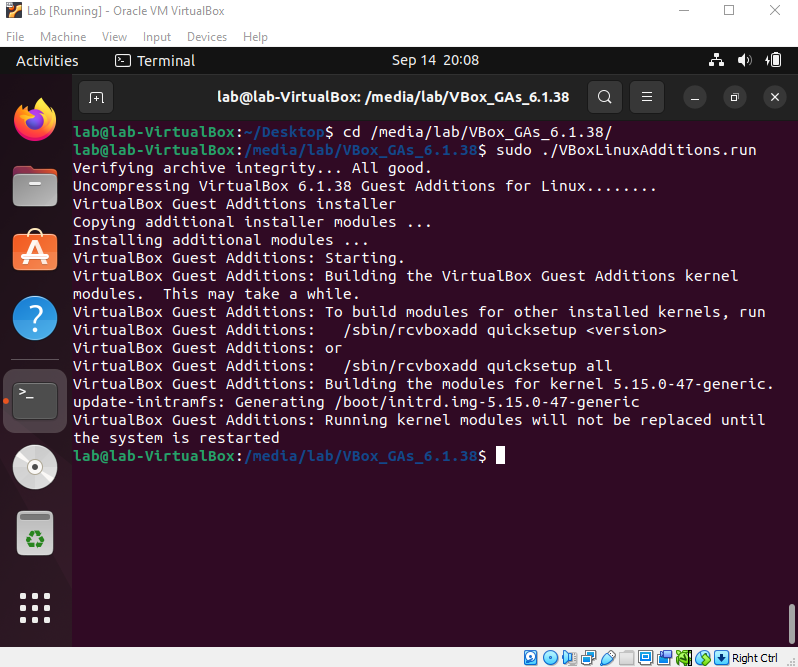
- Once that's done, the virtual machine will need to be restarted
- The shared clipboard can be enabled by navigating to Settings > General > Advanced and setting it to "Bidirectional":